
Network Attached Storage (NAS) systems are a great way of storing your photographs locally and are used for data management in both business and prosumer environments. Needing such a storage solution, I decided to put the UnifyDrive UT2 through its paces, discovering its many hidden surprises.
NAS architectures, traditionally reliant on mechanical hard drives for bulk storage, are increasingly integrating solid-state drives (SSDs). Most recently, it’s the M.2 form factor that meets the demands of high-speed data access. If you are unaware, M.2 refers to rectangular circuit boards designed to fit directly into a compatible slot in a NAS device or on a computer’s motherboard. They are much faster than traditional drive types and connections. The M.2 form factor was originally developed for laptops and compact PCs. However, it has found a new niche in NAS systems. The drives support both SATA and NVMe protocols, with NVMe offering significantly higher throughput by connecting directly to the PCIe bus.
NAS systems provide a centralized, network-accessible storage solution. Historically, NAS utilized 3.5” SATA hard drives due to their cost-effectiveness and high capacity. However, because of the ever-increasing need for high-speed data transfer, the mechanical limitations of HDDs have become bottlenecks. The result is usually lag.
SSDs, particularly those in the M.2 form factor using NVMe interfaces, offer a much faster alternative. Moreover, M.2 SSDs are compact, energy-efficient, and capable of delivering read/write speeds exceeding 7,000 MB/s.
Another big advantage of solid-state drives is their lack of moving parts. Consequently, they are less prone to failure, with an MTBF (mean time between failures) often around 2 million hours.
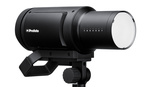
The UnifyDrive UT2 Description and Setup
The dual M.2 slots allow this NAS drive to be small. In its protective silicone sleeve, it measures approximately 17.5 cm x 8.2 cm x 2.6 cm (approx. 6.9” x 3.2” x 1.2”). It’s a neat and robust-looking device.
Beneath is the removable cover (screwdriver included) for installing the M.2 SSDs. These cards are not supplied, and note that PCIe cards are not compatible. So, ensure you buy the correct SSDs to fit in this device. It must be disconnected from power when you insert the drives. They are inserted at an angle and then pushed down into place.
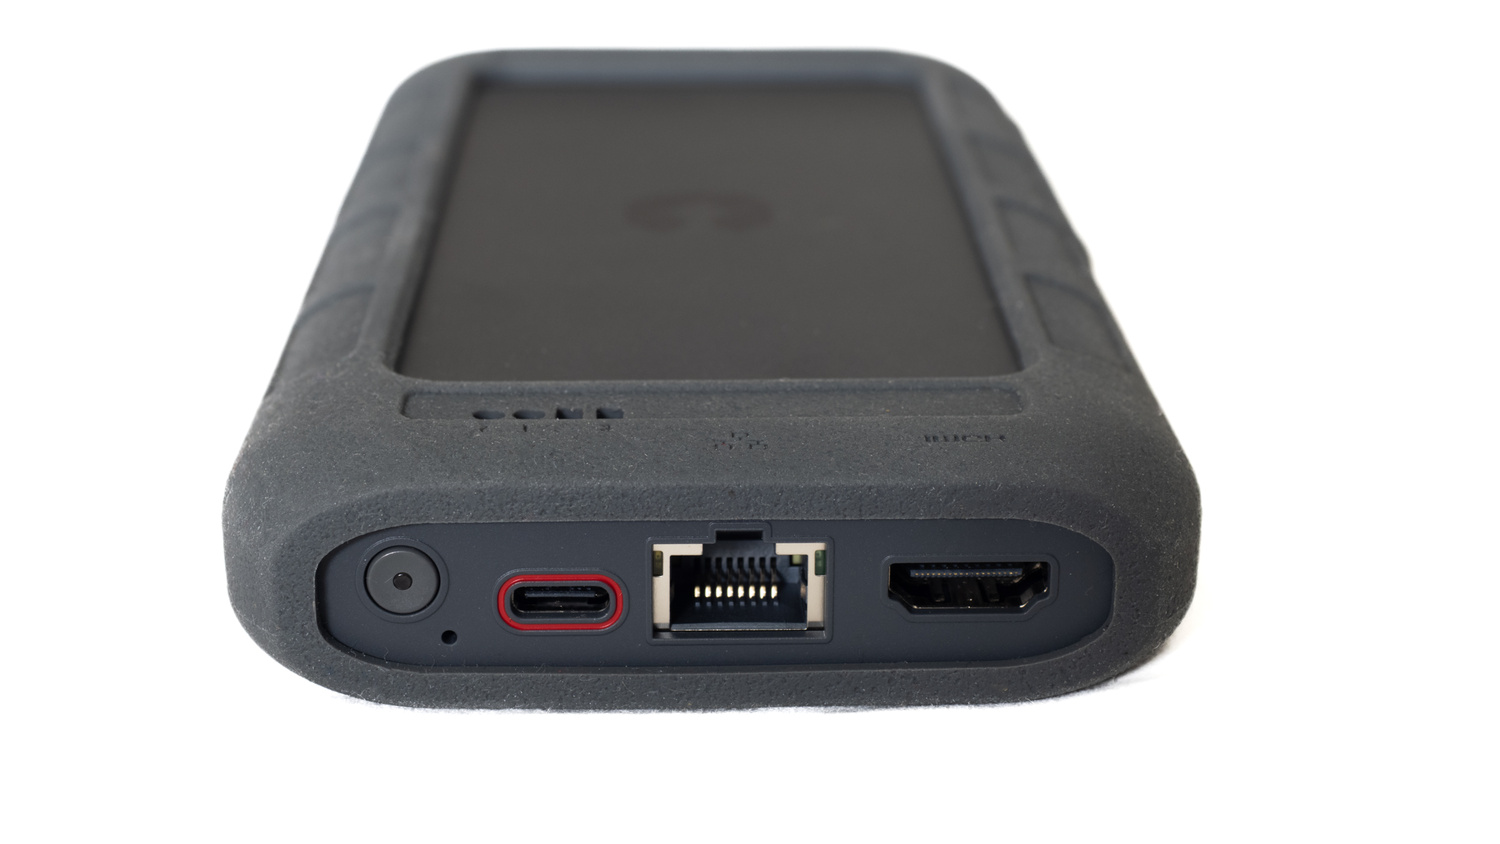
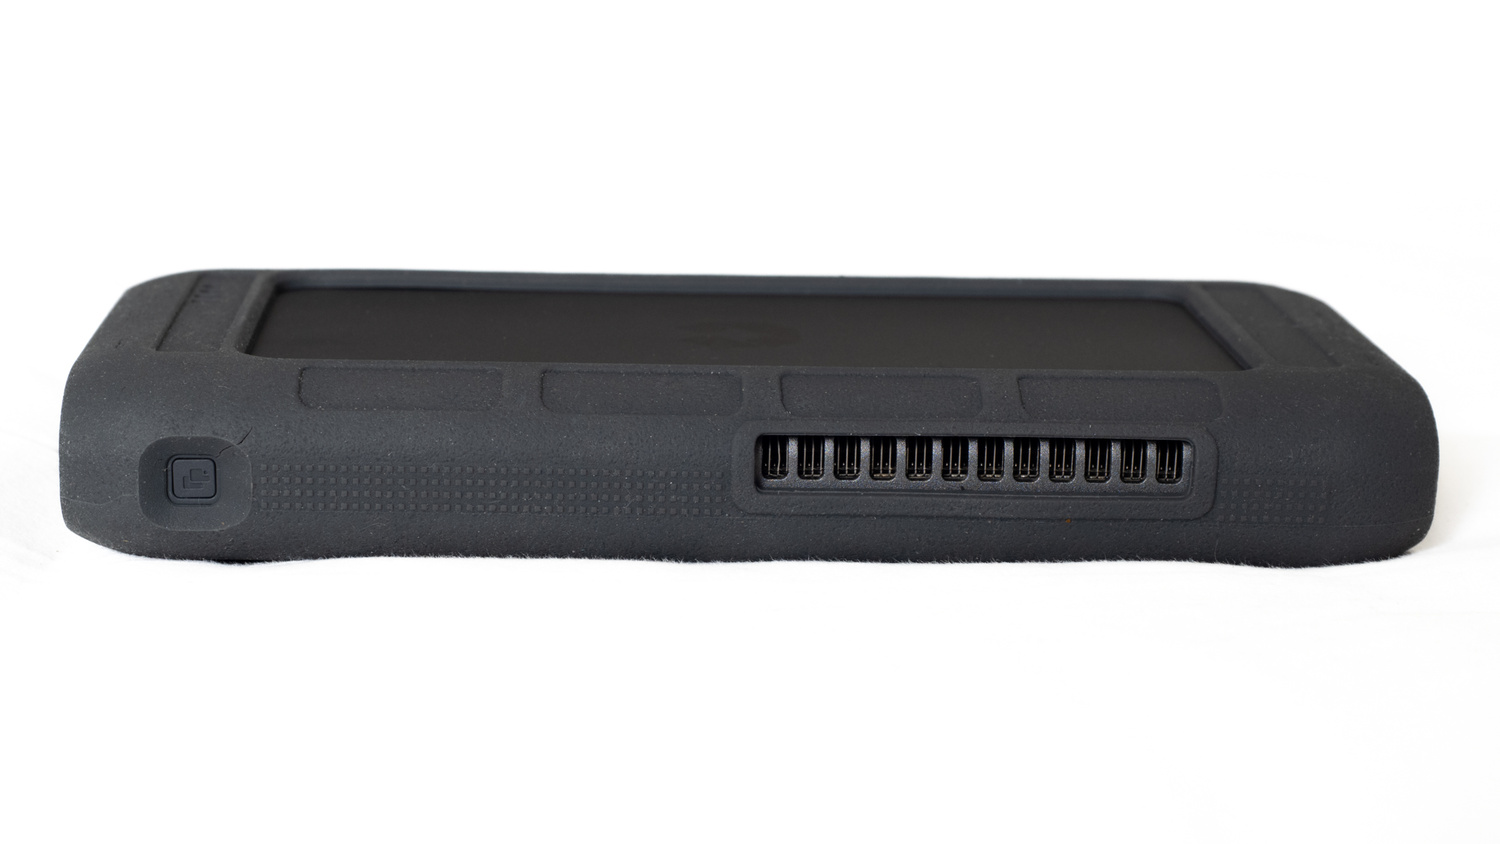
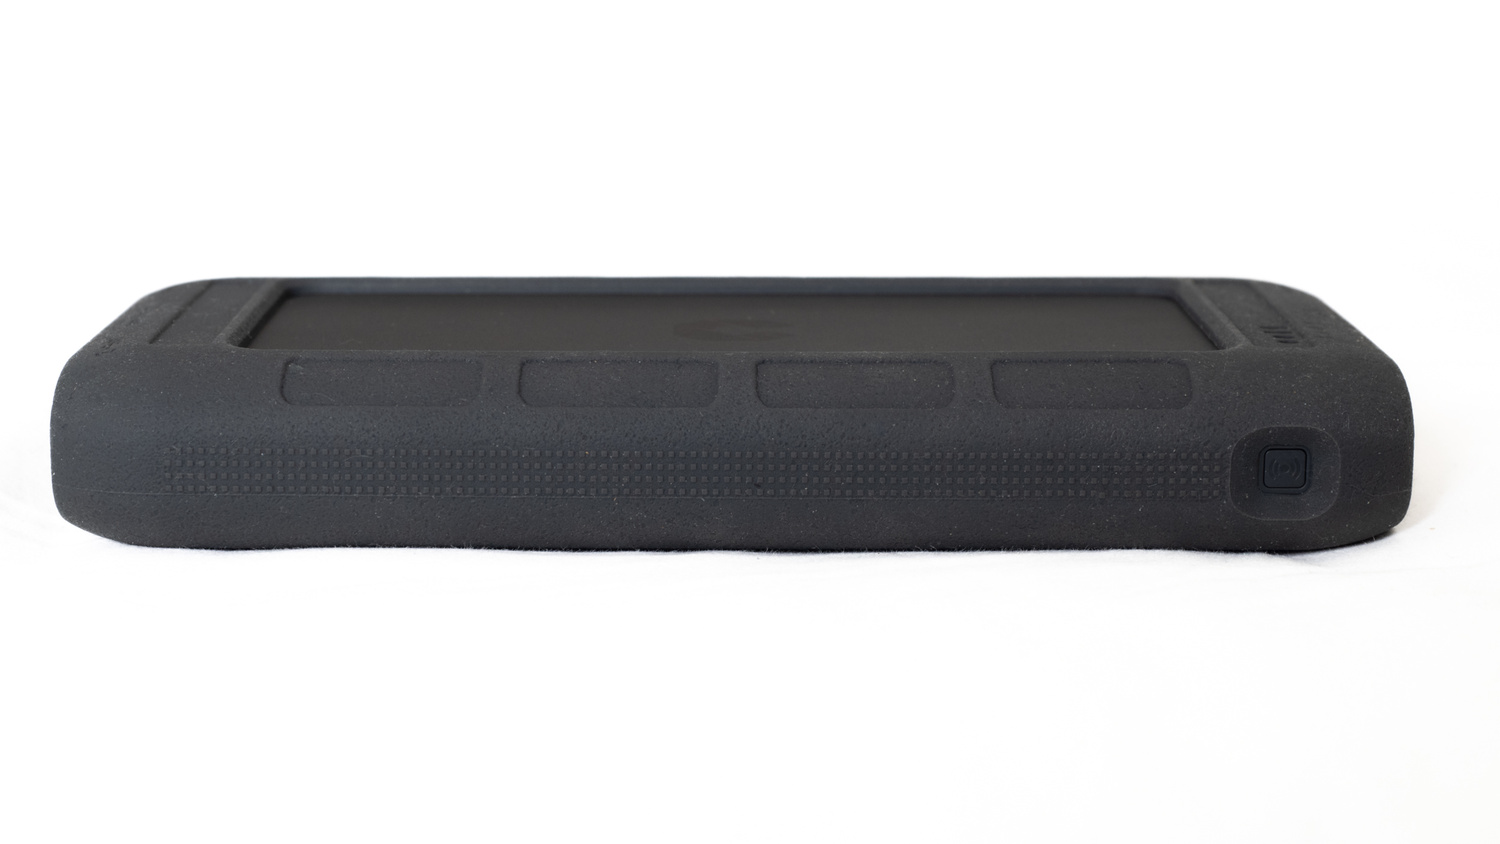
Besides the USB-C power-only socket, there is a LAN Ethernet port, an HDMI port, a power button, and a device reset hole. On one side is a “Plug and Backup” button, along with the cooling vent. On the other side is a Wi-Fi Hotspot switch button. Meanwhile, on the front is a USB 3 socket and a USB-C port, along with a CFexpress and SD port.
Once the SSDs are installed, connect them to the network using the supplied LAN cable and plug the power supply into the red USB-C socket. The instructions stress the importance of using a 9 V/12 V PD protocol power supply; there is one included in the box. The device has a small, inbuilt UPS, and attaching an incorrect power supply could damage it.
Next, you need to download the UnifyDrive app and use that to connect the drive to your network. You can also connect the device via Wi-Fi using the app.
In Use
Unless stated otherwise, all functions I tried were accessible through the app.
The device was easy to set up. I inserted two good-quality SSDs that I bought separately. Those would need to be formatted. I then plugged in the LAN cable and powered it up. The full startup takes about a minute. Red lights on the front indicate that the hard drive is in place and working okay.
I chose to use the LAN connection because I have capacity on my network. However, it can also be connected to Wi-Fi through the app via Bluetooth. It can also be used as a Wi-Fi hotspot. Predictably, that was not as fast as my Wi-Fi router, but it is a useful function nonetheless. That is activated with the Wi-Fi and WLAN Hotspot Switch button on the side of the device.
The default password is insecure and guessable, so I changed that immediately and advise you to do the same as quickly as possible.
I then activated the device using the UnifyDrive app.

I use the UnifyDrive UT2 mainly as a backup drive for my network, accessing it with a browser link. However, that is not the only option.
-
The device is compatible with Android and Apple TV as well as cellphones and tablets.
-
The Virtual Device allows the device to multitask. You can play games, browse, listen to music, and perform other functions, up to six in total, all at once.
-
It has a flash drive function, allowing it to be connected directly to a computer via USB.
-
Incredibly useful for photographers, you can plug in an SD or a CFexpress card and back up your photos with the press of a button.
-
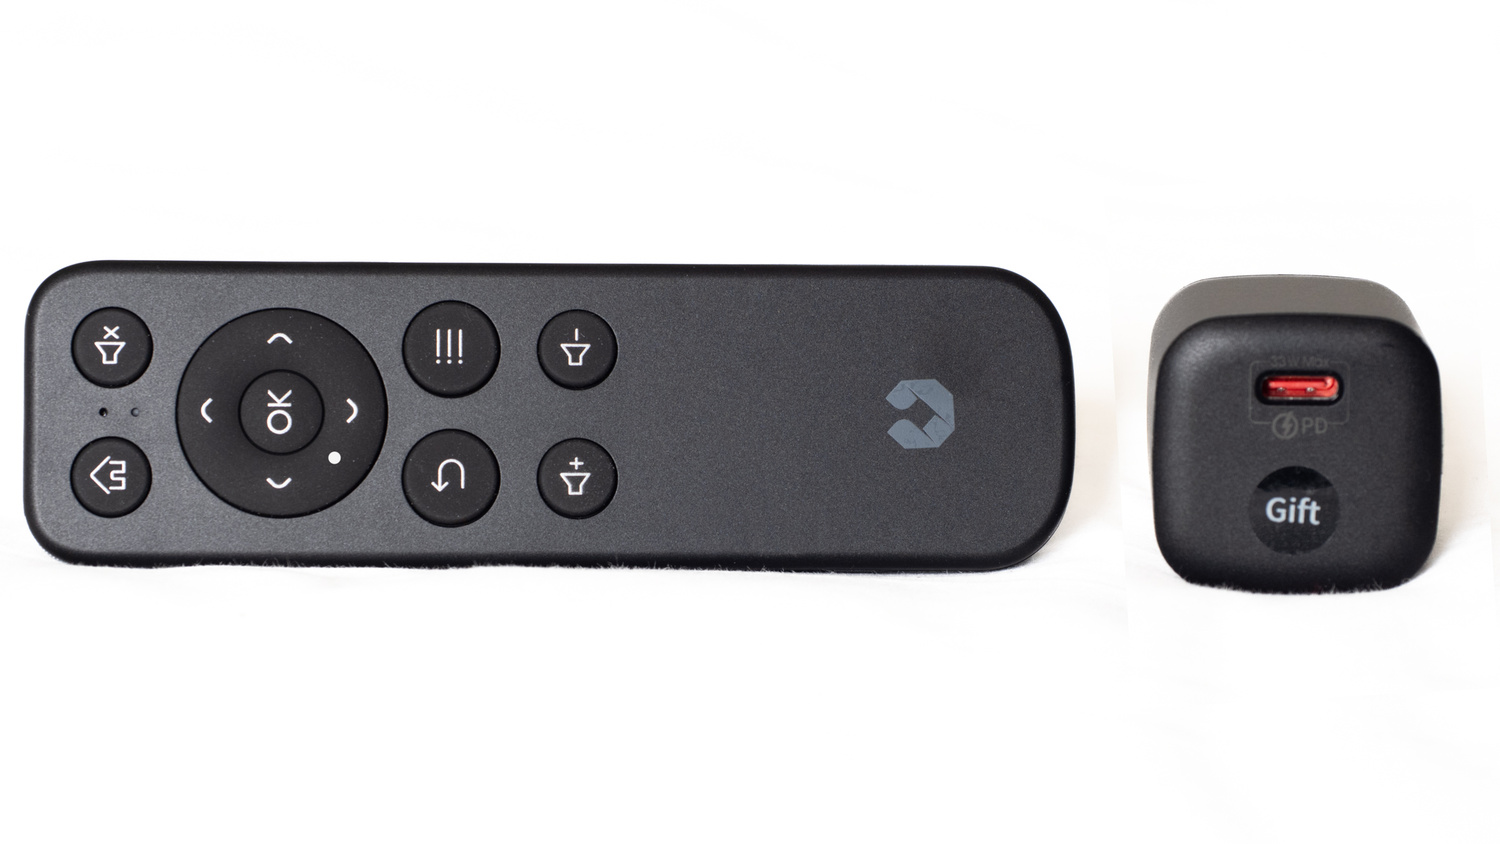
There are other uses, including streaming to a screen using a mobile app, an output to desktop function (which uses the included remote control that you must pair with the device), and the ability to output to AR and VR glasses.
-
Within my network, I want to share files with other users. Using the drive is a quick way of facilitating that. Furthermore, it has file permission control, allowing you to control read and write permissions.
-
It can also encrypt files, making them safe before uploading them to a cloud service.
I found the drive to be fast and reliable. The speed of file transfer will depend on your network hardware as well as the hard drives you buy and install in the device.
What I Liked
-
Relatively easy to set up and use.
-
Fast data transfer rates.
-
Instant backup of memory cards.
-
Loads of useful functions.
-
Small and well made.
-
One of the best instruction manuals of any equipment I have owned. It’s precisely written in plain English.
What Could Be Improved Next Time?
- I have no suggestions.
In Conclusion
This is one of those devices that I wasn’t aware of how useful it would be until I owned it. Its multitude of functions and easy accessibility make it a worthwhile investment that I can recommend. If you want to back up and share your files locally, have the convenience of traveling with that backup, and take advantage of all the extra features this drive has, then you will not go far wrong. It's something I cannot work without.


The challenge with using M.2 for a nas is that the cost per gb of storage is wildly higher than a system with HDDs. Furthermore SSD tolerance for writes is much lower meaning they will wear out faster increasing the cost even more.Yes the moving parts of an HDD does create a failure point but if you are using server grade drives like WD Red you can expect a much longer lifespan thab M.2 SSDs.
Imo something like this is great for a working drive array to edit from because you want the fast read writes but I, personally would never use it as nas where I store my catalogue.
100% agree. Choose your preferred RAID w/ hot spare config and use a proper multi-drive NAS for storage/backup/primarily read-only tasks. For working tasks use a decently fast SSD in an enclosure that gives you the fastest Read/Write your machine can manage (Thunderbolt 3/4/etc) with a versioned backup task to keep recent edits on the NAS.
Then again, Synology/QNAP/etc didn’t give him a freebie and this company probably did. Experience has shown that we mostly only get gear-based articles from him when that’s the case.
Would be lovely to be proven wrong in this case. Ivor?
This is more of a portable redundant solution for projects and work than it is your only backup solution, at least in my experience with it!
This would have been awesome device for my upcoming 3-week travel, that would allow me store 2nd copy of all recorded photos and videos, (maybe) connect via ethernet to bypass hotel’s congested wifi network, and have probably few other uses.
But at ~500 USD base + cost of NVME, I think I will rather stick to what I already have: a tablet, anker hub, and external drive.